My Mum lives in a place called Coomboona – though very little evidence exists to confirm that this is even a ‘place’. You can't get there following road signs, for Coomboona has no signage to indicate its existence; there is no township; no post office (though legend has it that there was one, once); and Google Maps is in the unfriendly habit of ignoring us altogether in favour of adding the prefix ‘North’ to the name of the nearest town (a substantial distance away) and lumping us in with them. For all of this though, Coomboona is what the place has always been called, and despite its apparent obscurity, it’s not all that difficult to get to from Melbourne … or not until the very last minute at least. Heading north for about 2hrs or 200 kilometres on the huge corridor of the Hume Highway, Coomboona is just one exit away. Well, one exit, and one barely marked little right hand turn.
The road onto which this hidden turn takes you is very long, and runs straight as a die. A distant line of bush shimmers at its end, glimmering green forest gums marking the edge of the Goulburn river. The straight set of the road is deceptive though, for as you drive along, a circuitous cast of characters and scenes to rival Alice’s experience in Wonderland appear out the window to either side...
First, there are the Alpacas to the right. Though normally found on chilly Peruvian hillsides, they seem, to me at least, equally happy munching down the dry summer grass that grows high along the fence-lines of the flat river plain, (though what might constitute an unhappy alpaca face, I don’t know). Next, and to the left, are some pomegranate plantations, flowers red and large like hibiscus on lush green shrubs lending an incongruous tropical feel. Further, and to the other side of the road, are acres of vineyard and a little winery bottling up classic French varieties grown half a world away from their original home. A small distance further again, across from some orchards of apple and pear, a hundred or so little brown and white dairy goats wander curiously at the feet of the lofty knock-kneed camels who are their strange new field-mates, (this recent and particularly unlikely addition to the roadside menagerie a surprise even to me).
But past all of this, when you seem to be almost at the bush line itself, and when black and white dairy cows are beginning to appear to both sides, you are finally (almost) there. Look up for the glimpse of white roof above the trees, and turn in through the black iron gates – a final rabbit hole through the rabbit hole – Coomboona Homestead, the green garden oasis amidst an Australian bush backdrop of eucalypt and sun-burnt yellow that my Mum calls home.
One of the things that I look forward to on my visits to the Homestead is Mum’s cooking. Unfortunately, having done a fair bit of cooking for me over the years, one of the things that Mum looks forward to about my visits is taking a break from cooking and having me cook for her! This year I came up with a kind of mutually agreeable solution – we’d make some of Mum’s classic dishes (and my favourite things to eat) together, and I’d write them down here, so I can’t claim to not know how to make them in the exact way she does in the future!
But Mum’s repertoire of classics is large, and my list of favourites long, so to us help us choose what to make, we consulted her vegetable garden...
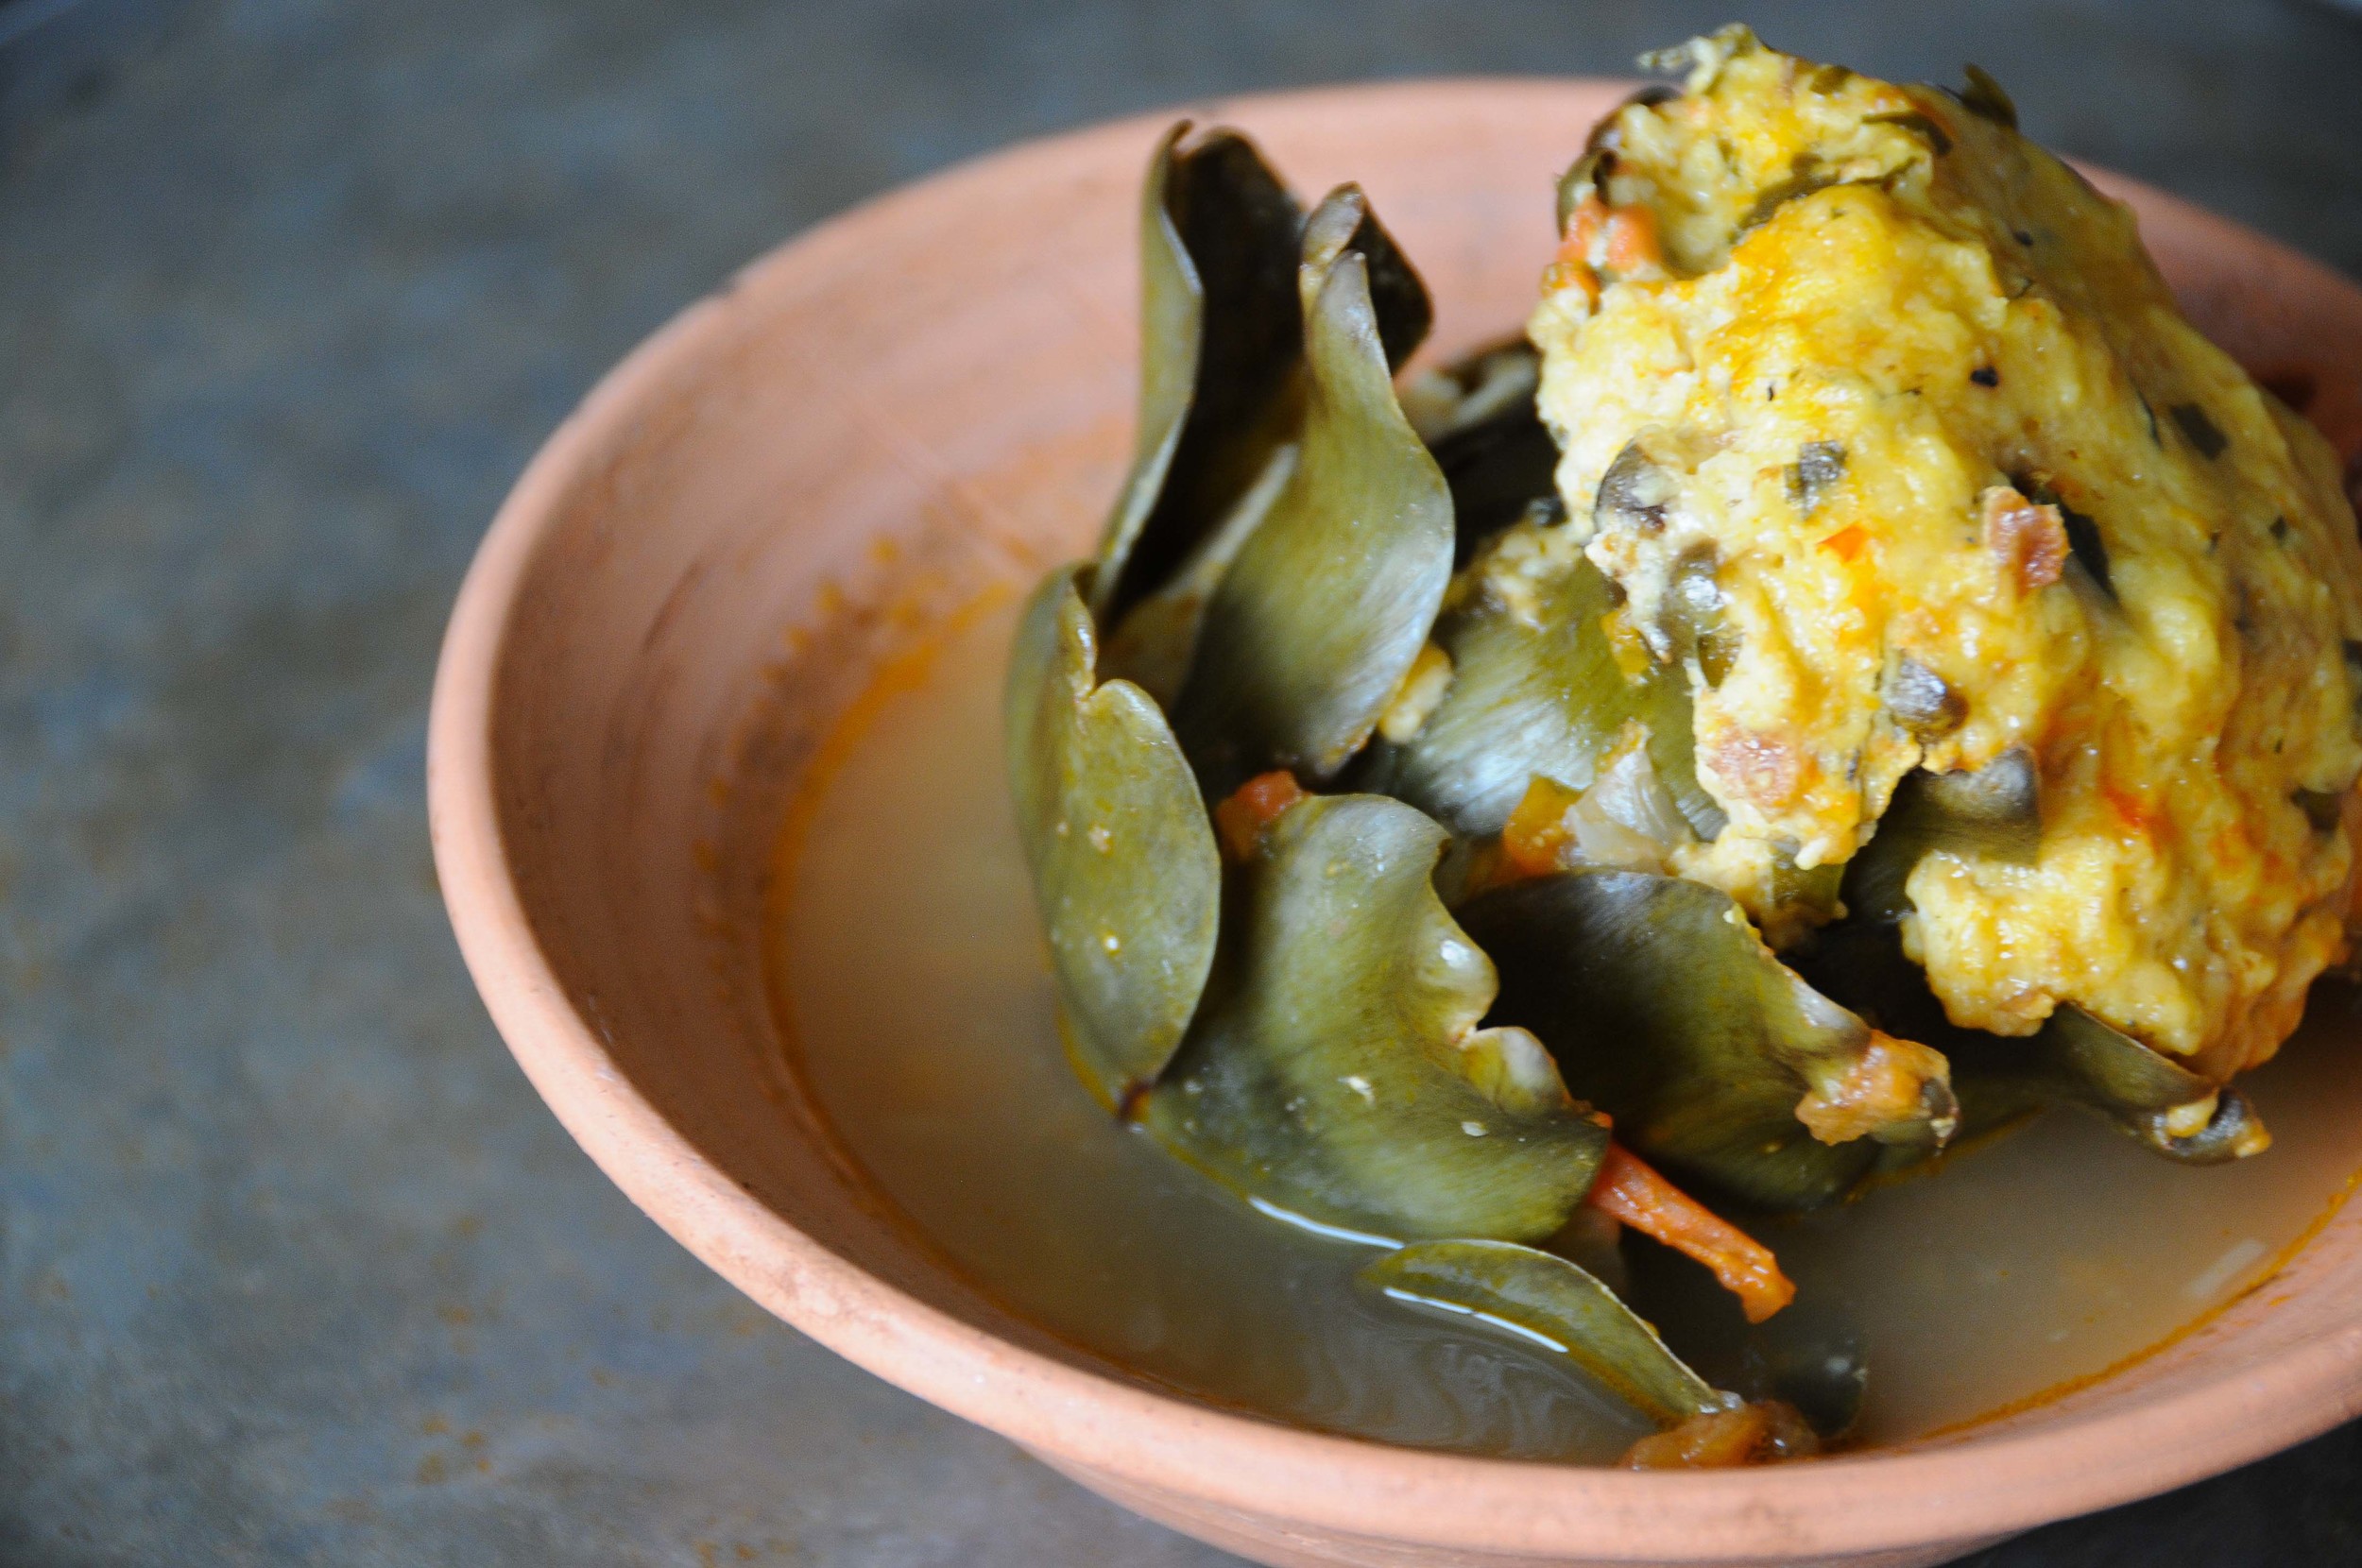
Large thistle bushes sprouting beautiful tender artichokes offer up an easy answer – stuffed artichokes in a tomato broth. Something I can remember enjoying as a very young child, picking apart the leaves and making a game of scraping the flesh off one by one with front teeth. And an all the more pertinent a choice given that I tried to make this myself only a few months ago with only what might flatteringly be called ‘limited’ success. I may have attempted to blame the particular artichokes at the time, but on reflection, my technique may have also been at fault – the significance and quantity of cheese involved escaped my memory a little, which is strange, cause ordinarily I like to err on the side of extreme generosity in all matters cheese. But anyway…
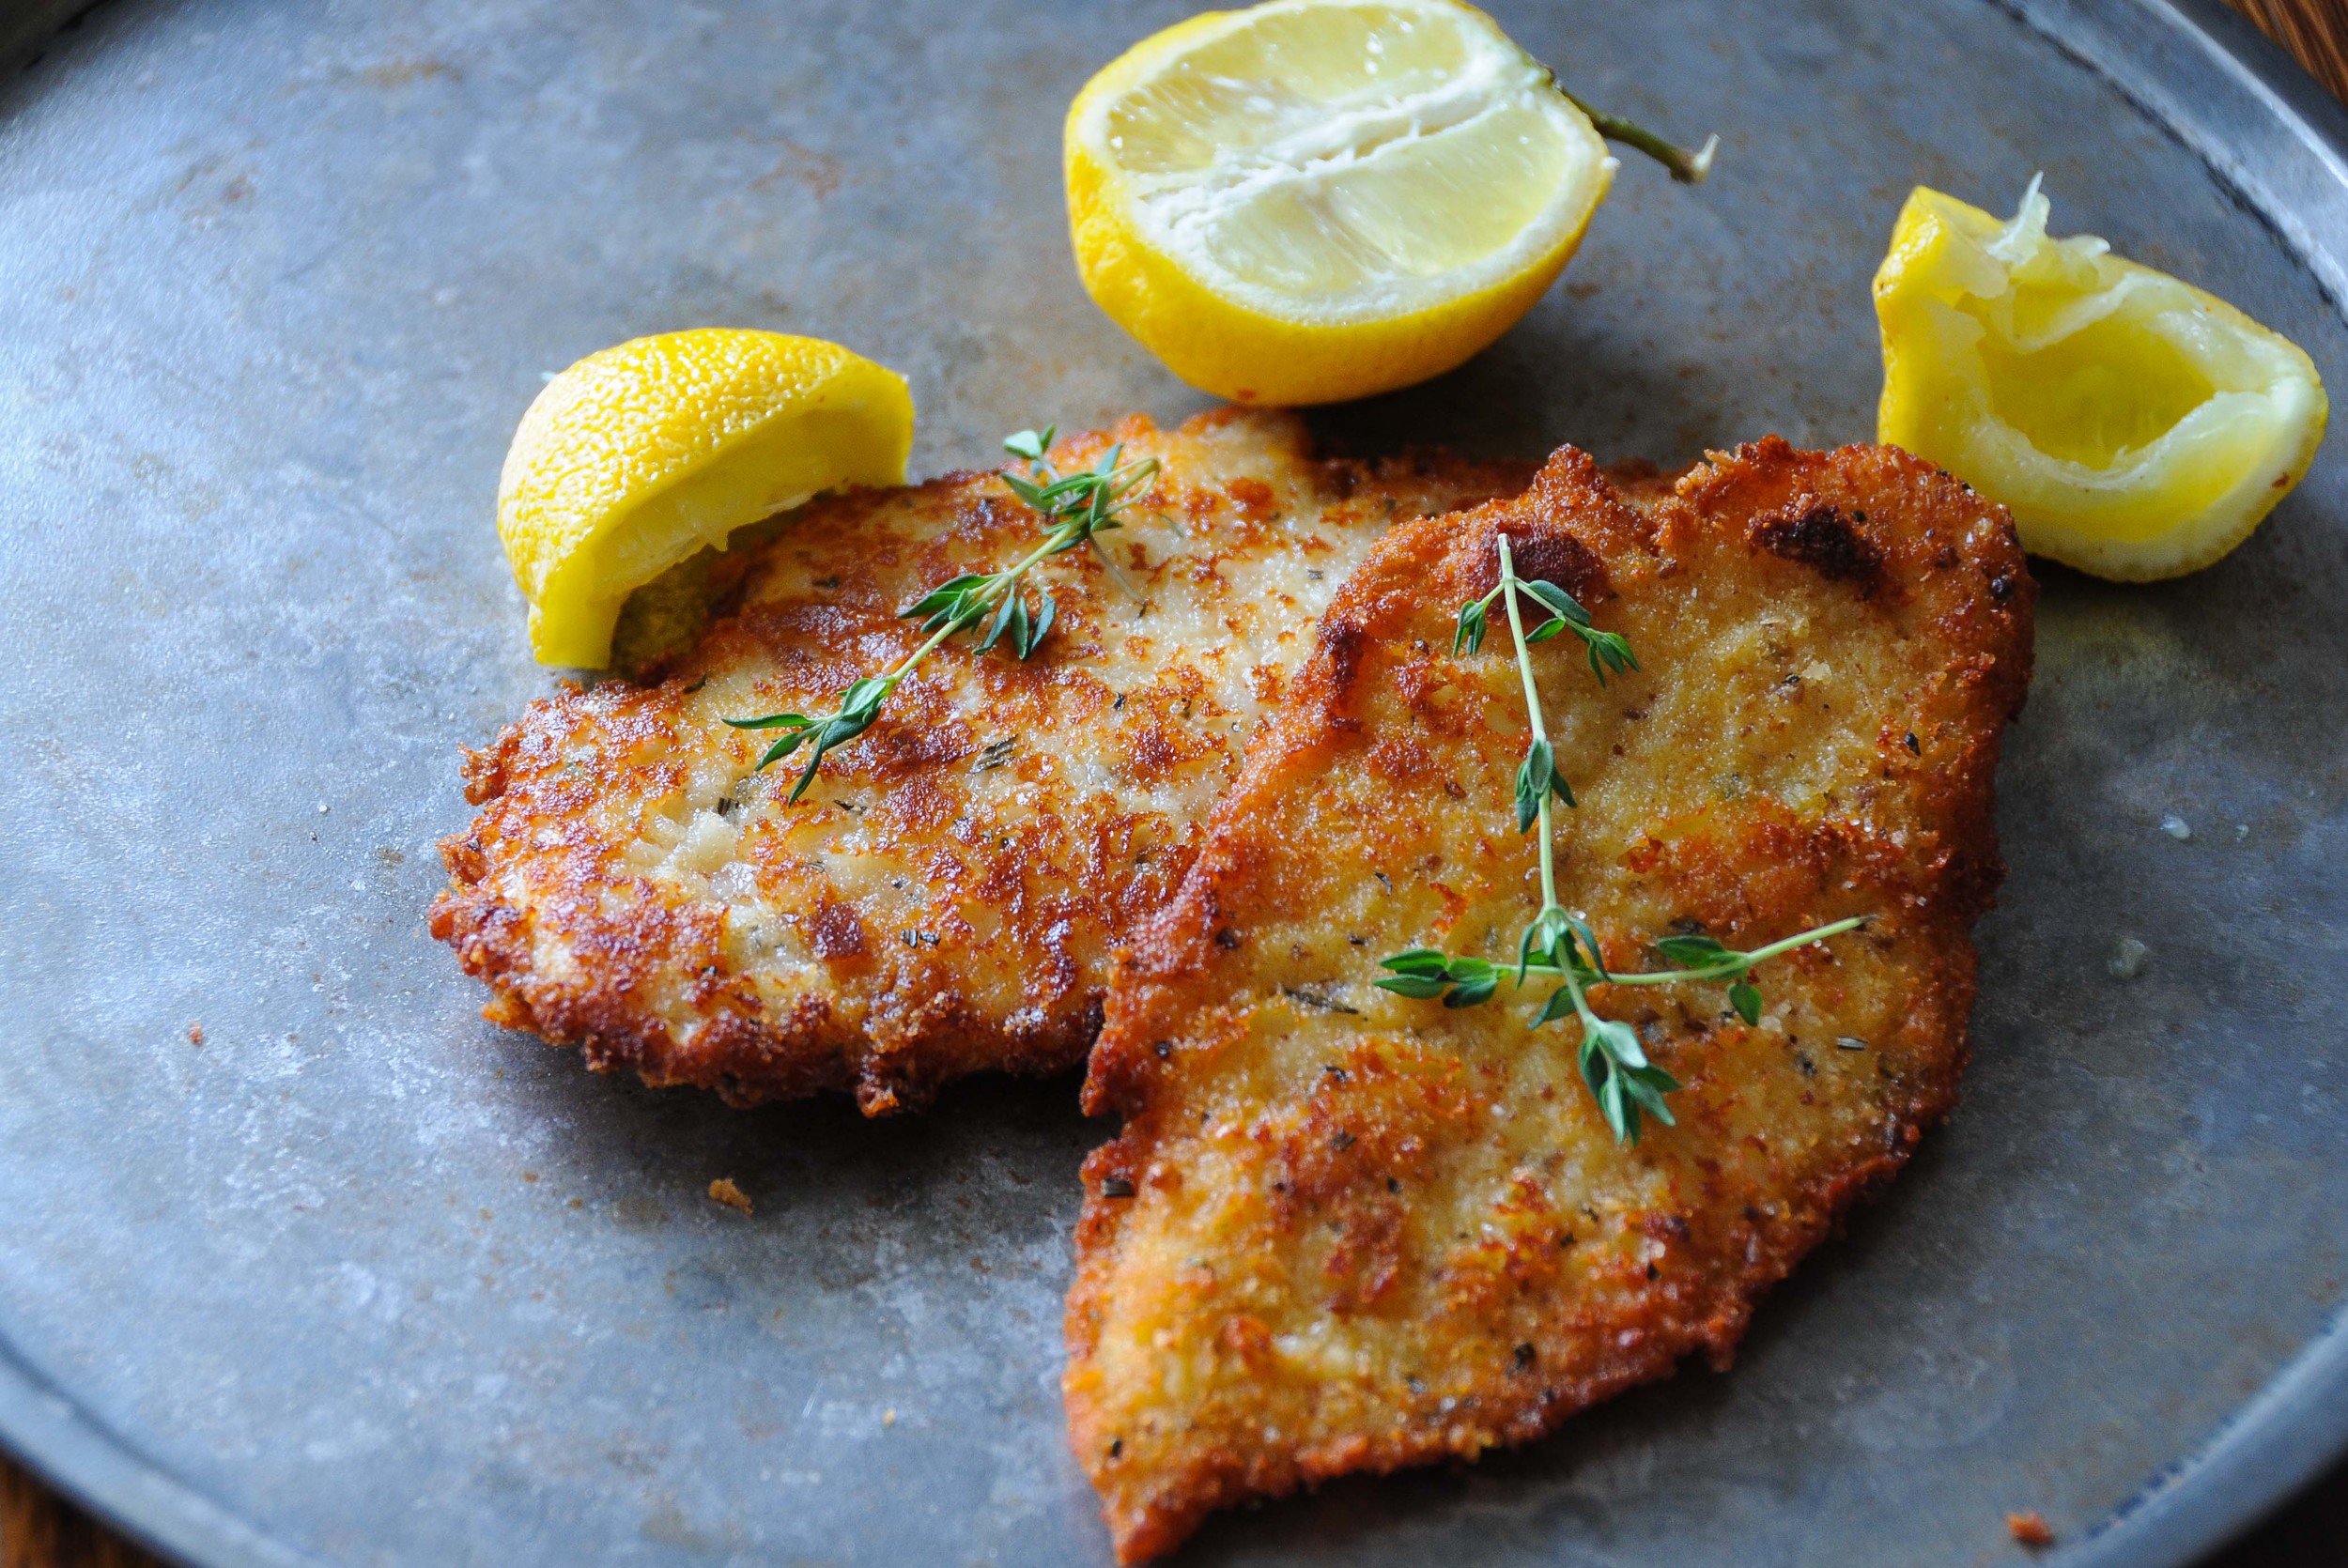
Next, in the herb garden, where the last of the spring parsley was looking to be on the verge of going to seed, we decide on chicken cotoletta. Parsley is key in my Mum’s cotoletta, and though we’ve experimented with other herbs a few times over the years, the traditional parsley has endured. It works best as it is flavourful enough to be tasted through the outer layer of crumb, and makes a good flavour complement to the Parmesan cheese.
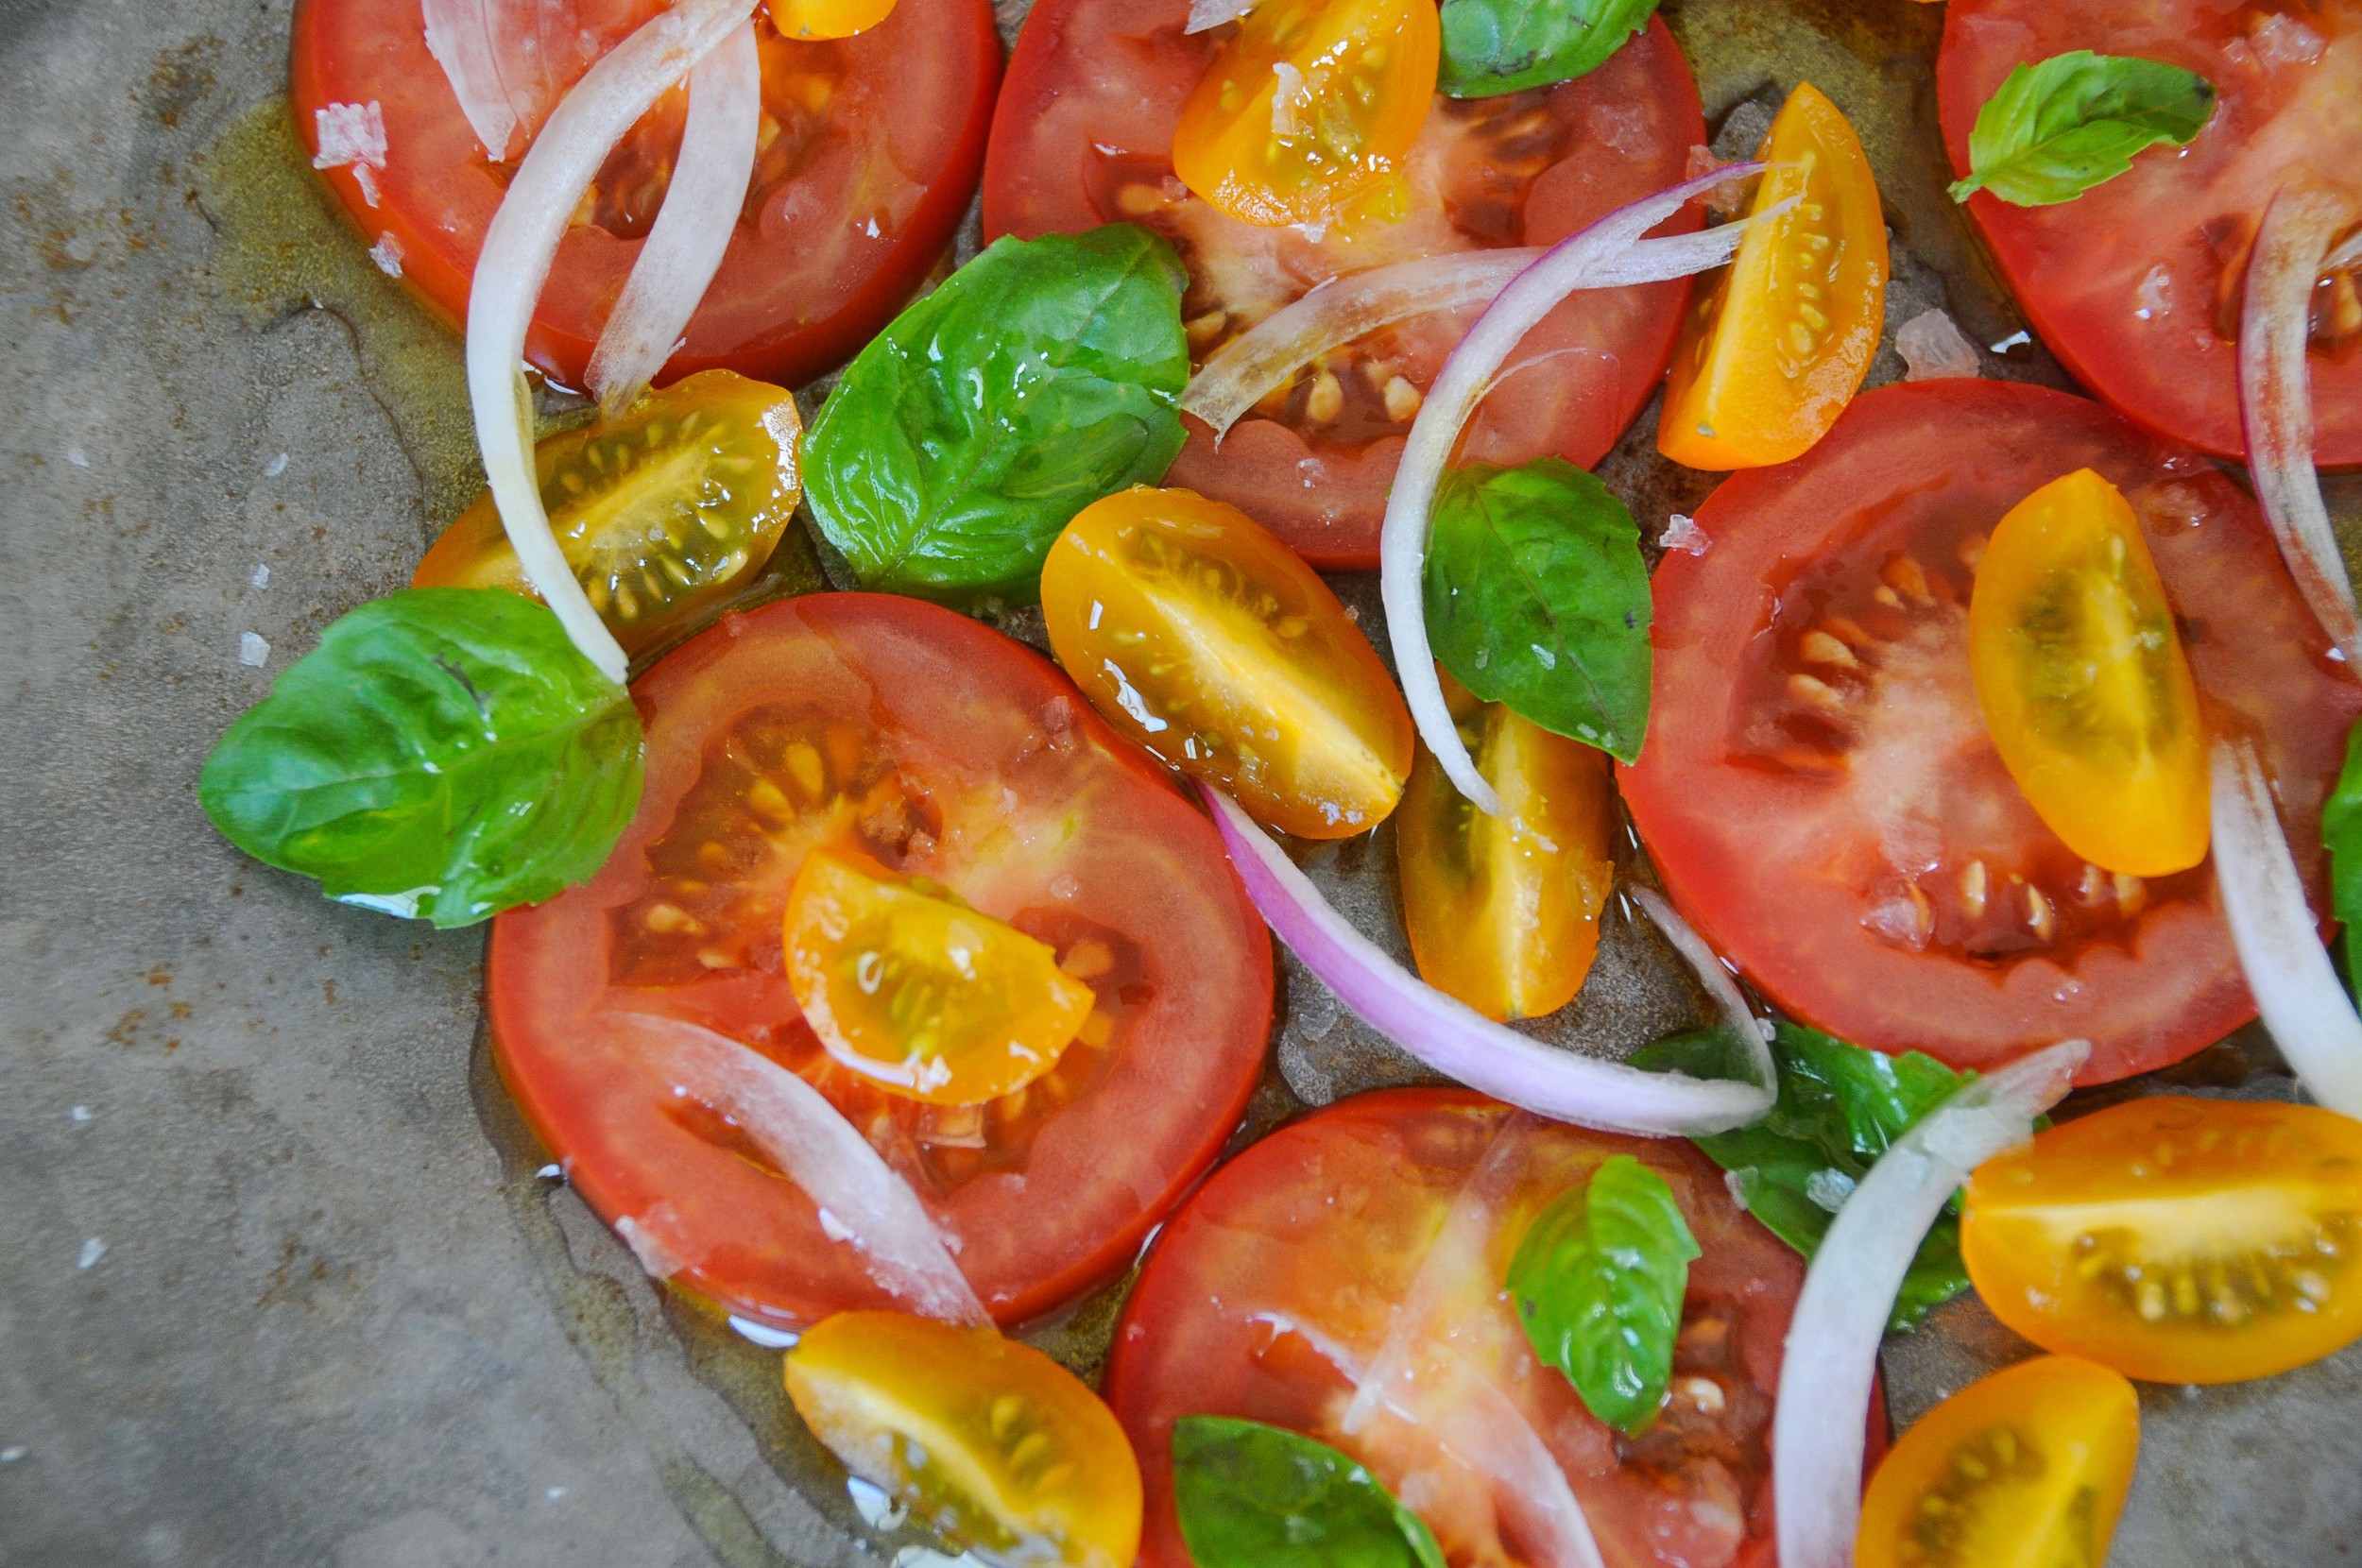
Lastly, a patch of prize-winningly enormous red onions call for Mum’s Sicilian tomato salad – her favoured accompaniment to almost every summer meal, served with crusty white bread and fresh olive oil. Being only the beginning of December, the tomatoes themselves were sadly still a little green on their stems, but luckily there are supermarkets to solve that problem, even if they are a long and fairly strange drive away.
Stuffed Artichokes
Ingredients
(Serves 4)
- 4 artichokes
- 3 large eggs
- 50g fresh breadcrumbs
- 50g freshly grated Parmesan cheese
- Small bunch of parsley - chopped
- ½ small onion – roughly chopped
- 4 tomatoes – roughly chopped
- 1 tablespoon olive oil
- Sprinkle of sea salt
To make the stuffing, combine the breadcrumbs and eggs in a large bowl and mix together. Add the grated Parmesan cheese, chopped parsley, and a sprinkle of salt, and continue to mix. The ingredients should bind together easily to form a ball if pressed. If your mixture is not coming together in this way, add an additional egg, and stir this through – the stuffing should come together following this addition if it was not sticky enough previously.
To prepare the artichokes, remove most of the stalk, and the toughest outer leaves. Tap the artichokes, tip first, against a hard surface, such as the kitchen bench-top, just to open these up a little and make more room for the stuffing.
Using a spoon, or your hands, place some stuffing in the centre of each artichoke, compacting this down and adding some additional stuffing between the open outer leaves.
The best pot to cook the artichokes in is one that will fit them snuggly standing upright. Once you’ve sized-up a suitable pot, heat the olive oil in this and fry the chopped onion until lightly browned. Add the chopped tomatoes and stir to combine with the onion. Now arrange the artichokes in the pot, doing your best to keep these propped upright against one another.
Carefully add water around the edge of the artichokes until it comes to just beneath the edge of the stuffing on top, then sprinkle a generous amount of salt through the water. Cover with a lid, turn the heat up under the pot, and bring to a boil. As soon as the water has boiled, turn the heat down to a simmer, (continuing to boil will displace the stuffing), and cook slowly for approximately one hour.
To test if the artichokes are cooked, pull on an outer leaf. If this comes away easily the artichokes are ready, if not, give them another 15 minutes simmering and test again. Especially large artichokes will of course take longer to cook.
To serve, place each artichoke in a bowl and spoon some broth over the top. Crusty bread for mopping the juices is delicious, kitchen roll for mopping up the mess is essential!
Chicken Cotoletta
Cotoletta are the topic of much discussion and some contestation in my extended family. For a long time, the unspoken consensus was that, while my Mum’s version were very good, those of another family member (who will not be named for reasons of Sicilian pride!) may have been slightly better. Mum rallied though, and through trial, error (I recall Kellogs cornflake crumbs were part of one experiment), and repetitious perfecting, arrived at the recipe below. She was almost reluctant to let me publish her secret recipe, (certain other recipes having already been deemed too special for publication!), but the terms of deal being such that I can cook them for her in the future, Mum finally relented…
Ingredients
(Serves as many as 6, or as few 4, depending on who is eating)
- 600g chicken mini-breast fillets (tenderloins in ‘Australian’)
- 100g very coarsely grated Parmesan cheese – grate the cheese yourself using the coarsest edge of a conventional box grater
- 200g stale white bread (with which to make bread crumbs)
- 150g plain white flour
- 3 eggs
- Small bunch of fresh parsley – roughly chopped
- Finely grated zest of 2 lemons
- Fine sea salt
- Canola or light olive oil for shallow frying
Chicken mini-breasts (or tenderloins) are the smaller fillet attached to the underside of the larger chicken breast. These are sometimes packaged and sold separately, or you could ask your butcher for them specifically. The mini-breasts, once flattened slightly using a rolling pin, are the perfect size for cotoletta, but failing this, you can use whole chicken breast – just cut horizontally through to reduce the thickness and then in half lengthways to reduce their size before flattening.
I always think of making cotoletta as a kind of production line. First there is the flour station, then the egg, then finally the crumb.
The flour is the easiest to set up, just measure out about 100g, pour out onto a large flat plate, and sprinkle with a little salt.
Next, for the egg station, break three eggs together in a deep bowl, and beat together adding a sprinkle of salt, the finely grated lemon zest, and chopped parsley. (Including the parsley in the egg mix, as opposed to the crumb, prevents it from burning during cooking.)
Lastly, for the breadcrumbs, blitz the dry stale bread in a food processor until it forms a rubbly crumb. Don’t worry if some of the crumbs are quite large and flaky, other bits of the crumb will be much finer, and a mix of coarse and fine crumb achieves a good combination of crunch and coverage. (Shop-bought crumbs, with their boring uniformity, don’t give much in the way of textural variation and that’s why it’s nice to make the breadcrumbs at home.) Once you are happy with the texture you’ve achieved, pour the crumbs out of the processor onto a flat plate or into a shallow tray and mix through the coarsely grated Parmesan by hand.
To prepare the chicken, place a fillet between two layers of cling film and gently beat to a uniform thickness of just over 5mm using a rolling pin. Repeat for the remaining fillets, placing these in a pile, ready for the production line…
First, through the flour – cover both sides of the filet, patting the flour on to ensure that it sticks, then shake off any excess and onto the egg.
Dredge the fillet smoothly through the egg mixture using a fork, before holding it above the bowl momentarily to allow any excess to drip off before transferring to the breadcrumb and cheese mixture.
Pat the crumb mix firmly onto the fillet using your hands and covering all over before once again shaking gently to remove any crumbs that have not completely stuck.
If you’d like, the cotoletta can now be refrigerated for up to six hours before frying, (but preferably not longer or the crumbs will become too moist). Otherwise, proceed to fry immediately by pouring enough oil to shallow fry into a large, heavy-based frying pan and heating over medium heat. Allow the oil time to heat sufficiently before adding the first batch of cotoletta (frying up to three at a time depending on the size of your pan).
Cook on one side until the crumbs are golden-brown in colour, before turning over and cooking the other side. Turn the heat down slightly if your cotoletta are becoming overly dark very quickly as it is important to give the chicken enough time to completely cook through. Once cooked, lift out onto kitchen paper to drain.
Serve warm with some wedges of lemon to garnish. Home-cooked chips with an excess of flaky salt are my favourite things to eat alongside. Mum has always cooked her chips in an electric frying pan, and while I don’t know, formally speaking, why this should make them taste any better, I can promise you that they do! If you have an electric frying pan, give it a try, and let me know what you think…
Mum's Tomato Salad
This salad is a something of permanent fixture on our dining table at home. It is so familiar, that actually writing down a ‘recipe’ for it feels a little silly, so instead, I’ll just say this:
Take some perfectly ripe tomatoes and cut them into slices, chunks, or any other shape you like.
Slice some red onion, very finely if you want it to look pretty, or into rough chunks if you are less fussy. Mild, sweet-tasting red onions are best for this salad.
Tear up a small bunch of fresh basil leaves, bruising with your hands to release their flavour, and scatter these artfully across the top.
Then sprinkle some flaky sea salt all about. Be generous! The tomatoes really come to life with the addition of salt. And it won’t hurt you, this one time…
Squash a few of the tomato pieces at little to release their seeds using your hands, (or a fork if you must).
Now pour over some the very nicest, freshest extra virgin olive oil you can find.
Mix everything together, acquainting the sloshy tomato seeds with salt, and the oil…
And serve with some lovely crusty white bread. The taste of an Italian summer in December, in faraway Coomboona.
I’ll be back at the Homestead in January, cooking for a series of annual events that we hold there as part of International Dairy Week. I’m looking forward to raiding the garden again then, (when hopefully I’ll find some properly ripe tomatoes!), and of course raiding the dairy too in order to create some new recipes using lovely fresh milk, butter, and cream. Stay tuned for these towards the end of January 2014...
In the meantime though, it’s back to the Northern hemisphere winter - to the snowy slopes of Zermatt to be precise. If I can rouse myself from the cheese and glühwein stupor, I’ll write again from there. Merry Christmas!


